Yes, You CAN whip cream without making butter!
I am a firm believer in using real whipped cream for desserts. It doesn’t take long, you flavor it anyway you want, you know EXACTLY what the ingredients are, and it tastes better than anything in a tub or aerosol can.
I have to admit I am a cooking nerd and love to find out more information every day. I decided to research about the best cream for whipping. Some sites mention heavy as the key word: heavy cream or heavy whipping cream is needed. Whipping cream (sans heavy) is slightly different, has with a little less butterfat and is not supposed to be as good. I also read that you should avoid “ultra-pasteurized”. Even though I live in a metropolitan area with good grocery stores, I have a hard time finding heavy cream that is not ultra-pasteurized. I have used heavy cream, heavy whipping cream and whipping cream–pasteurized or ultra-pasteurized–and they all work. Some beat up a little more quickly, some seem to stay whipped slightly longer, but they all work. So I just don’t worry about it anymore.
Start with clean bowl, beater and COLD cream. Don’t put it out on the counter ahead of time. In very humid, hot weather, I chill the bowl and beaters in the refrigerator for a few minutes.
You can use a hand mixer or a stand mixer. Pour all the cream into the bowl unless you tend to over-whip your cream. If you are worried about that, pour all but about two tablespoons of cream into the bowl, and read on to the bottom of this page.


Start slow! Not only does this keep cream from dotting your walls and your clothes, but I find it helps maintain structure better. Turn the mixer on low to start until you see tiny bubbles, then increase the speed slightly until you see trails in the cream. Add the sugar and vanilla and increase the speed to medium or medium high. You do not generally need to turn the mixer to high speed unless you are REALLY in a hurry.


The first photo shows softly whipped cream (soft peaks); thicker ridges and soft peaks when you lift the beater. This stage is great when you want to add nice, casual dollops to individual slices of pound cake, fruit pie, or in coffee laced with liqueur. The second photo shows medium peaks. The cream holds a peak but bends over like bird’s beak. The third photo is the firm peak stage. Total whipping time should only take about 3-4 minutes.
I find it best to bring cream to medium peak stage when I want to fold it into other ingredients to make something like a mousse. I use the firm peak stage for piping around edges of cakes or cheesecake. I also put firmly whipped cream in a serving bowl, so friends and family can scoop out big spoonfuls to add to shortcake, tortes, pies, cobblers, or other desserts. Sometimes I make a double batch so I can bring it out with coffee and liqueur for dessert coffee.
What happens if you whip a little too long and end up with grainy looking whipped cream? That is when the extra couple of tablespoons of cream that were set aside are needed. Just pour the reserved cream over top and slowly mix it back in on low speed. It should emulsify nicely and look perfect. If you are worried about over-beating it again, you can use a whisk and simply beat in the reserved cream by hand.
My youngest granddaughter started walking at nine months; she was small and mighty, and we wanted her to gain weight with some high-fat food. We found that she LOVED a spoonful of whipped cream. She started to help me make the whipped cream garnish for desserts when she started walking. She stood on a stool, learned to pour the cream in-most of it would land in the bowl. She learned to stretch and reach for the “turn on” lever, how to adjust the speed, how to turn it off. And of course she got to lick the spatula. When she was 4 years old, she even taught some adult friends of mine how to make REAL whipped cream, so I am sure anyone can do it, too.
FRESHLY WHIPPED CREAM
- 1 cup heavy cream
- 1 teaspoon sugar (or less)
- 1 teaspoon vanilla extract or other flavoring (almond, rum, peppermint extract)
Pour the cream into the bowl of a mixer. Turn the mixer on low and mix the cream until tiny bubbles form, then slight ridges. Add the sugar and vanilla and increase speed to medium. When soft peaks form, turn the mixer up to medium high and continue whipping until medium or firm peaks form.
SQUEEZED CREAM
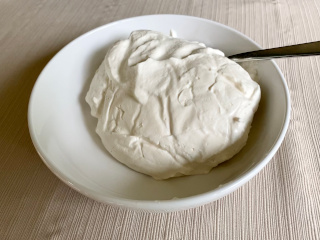
Finally, sometimes I do need to make whipped cream ahead of time. In order to keep it from weeping too much, I make “squeezed cream”. Simply line a sieve with a few coffee filters and get them wet. Put the whipped cream in and place the whole contraption over a bowl to catch drips. Refrigerate, lightly covered, until serving time. Then scoop the whipped cream into a serving bowl, and toss the water that has accumulated.


0 Comments
Trackbacks/Pingbacks